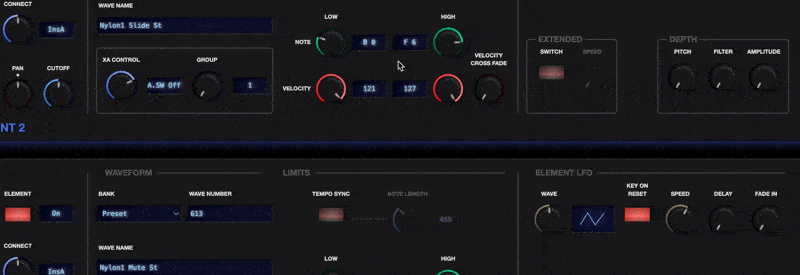
Today, a new way to work with controls that require a note or note range.

Click or drag any control that defines a note, and a keyboard will pop up.

As you move the controls, you can see the note or range adjust within the keyboard, or you can simply click within the keyboard to select a note.
If you keep the pointer pressed, you can drag the selected note up and down the keyboard.
When working with ranges, the end of the range closest to the key you clicked will be the one affected, so in the example above, I could click on F6 and drag the upper end of the range, or click on C2 and the lower end would be affected.
This also works for key scaling break points, where four control points define five zones across the key range.
Once again, the control note closest to where you click on the keyboard is the one that will be adjusted and dragged around.

Finally, you may notice the little keyboard graphic to the left. Clicking on this will enable keyboard selection for the currently-active control point. In the first image, it would affect the LOW end of the key range, and in the second example it would affect BREAK POINT 1. With keyboard selection active, the current note will be set to whatever note you press on a connected MIDI keyboard, just as with Montage and MODX. Toggle the control again to deactivate the mode.

To change the currently-active control, just click another control, or drag the part of the range that you want to affect, and you will see the text under the keyboard selection graphic update to show the currently-active control.

Click or drag any control that defines a note, and a keyboard will pop up.

As you move the controls, you can see the note or range adjust within the keyboard, or you can simply click within the keyboard to select a note.
If you keep the pointer pressed, you can drag the selected note up and down the keyboard.
When working with ranges, the end of the range closest to the key you clicked will be the one affected, so in the example above, I could click on F6 and drag the upper end of the range, or click on C2 and the lower end would be affected.
This also works for key scaling break points, where four control points define five zones across the key range.
Once again, the control note closest to where you click on the keyboard is the one that will be adjusted and dragged around.

Finally, you may notice the little keyboard graphic to the left. Clicking on this will enable keyboard selection for the currently-active control point. In the first image, it would affect the LOW end of the key range, and in the second example it would affect BREAK POINT 1. With keyboard selection active, the current note will be set to whatever note you press on a connected MIDI keyboard, just as with Montage and MODX. Toggle the control again to deactivate the mode.

To change the currently-active control, just click another control, or drag the part of the range that you want to affect, and you will see the text under the keyboard selection graphic update to show the currently-active control.